Inserting videos in PowerPoint can make your presentations more vivid and attractive, but sometimes the video playback speed may not meet your needs. For example, when presenting a long video, you may want to save time or improve your audience’s attention by speeding up the playback. Fortunately, PowerPoint provides tools to adjust the video playback speed. The following content will introduce how to speed up video in PowerPoint.
How to Speed up Video in PowerPoint
As a widely used presentation application, PowerPoint supports the presentation of regular elements such as text, pictures, and charts, and it also allows you to insert videos to enhance your presentation appeal. At the same time, it allows you to change the video speed to optimize your presentation. However, PowerPoint does not have a direct speed-up button, you need to use the Developer tab and Windows Media Player to realize the speed-up effect.
Let’s see the steps to change playback speed of video in PowerPoint.
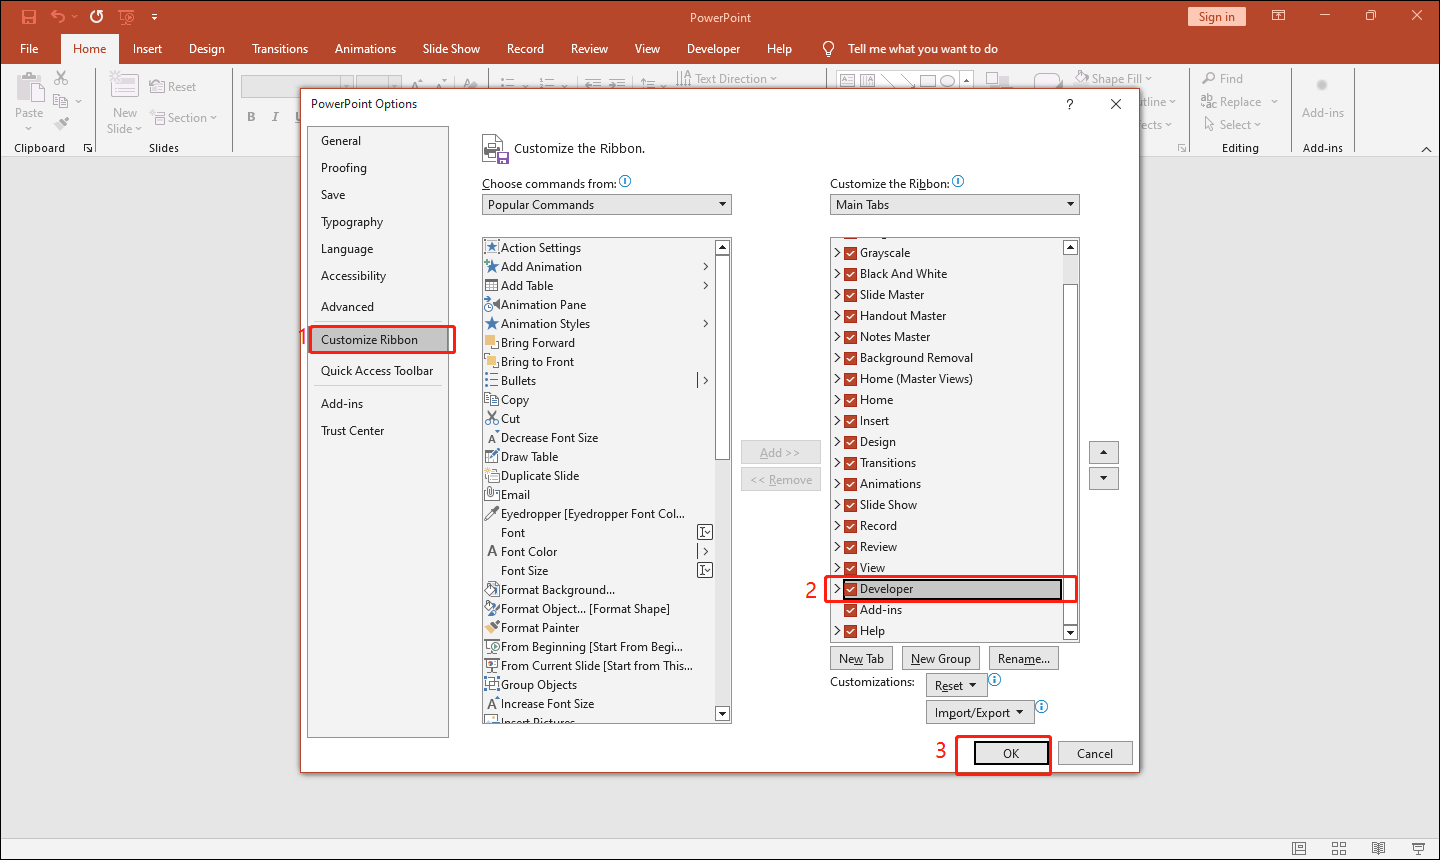
Step 1: Launch PowerPoint on your computer, and click Blank Presentation to create a new document. Click File in the top menu and select the Options button at the bottom. Select Customize Ribbon in the pop-up menu. Check the Developer box under Main Tabs and click OK to save your settings.
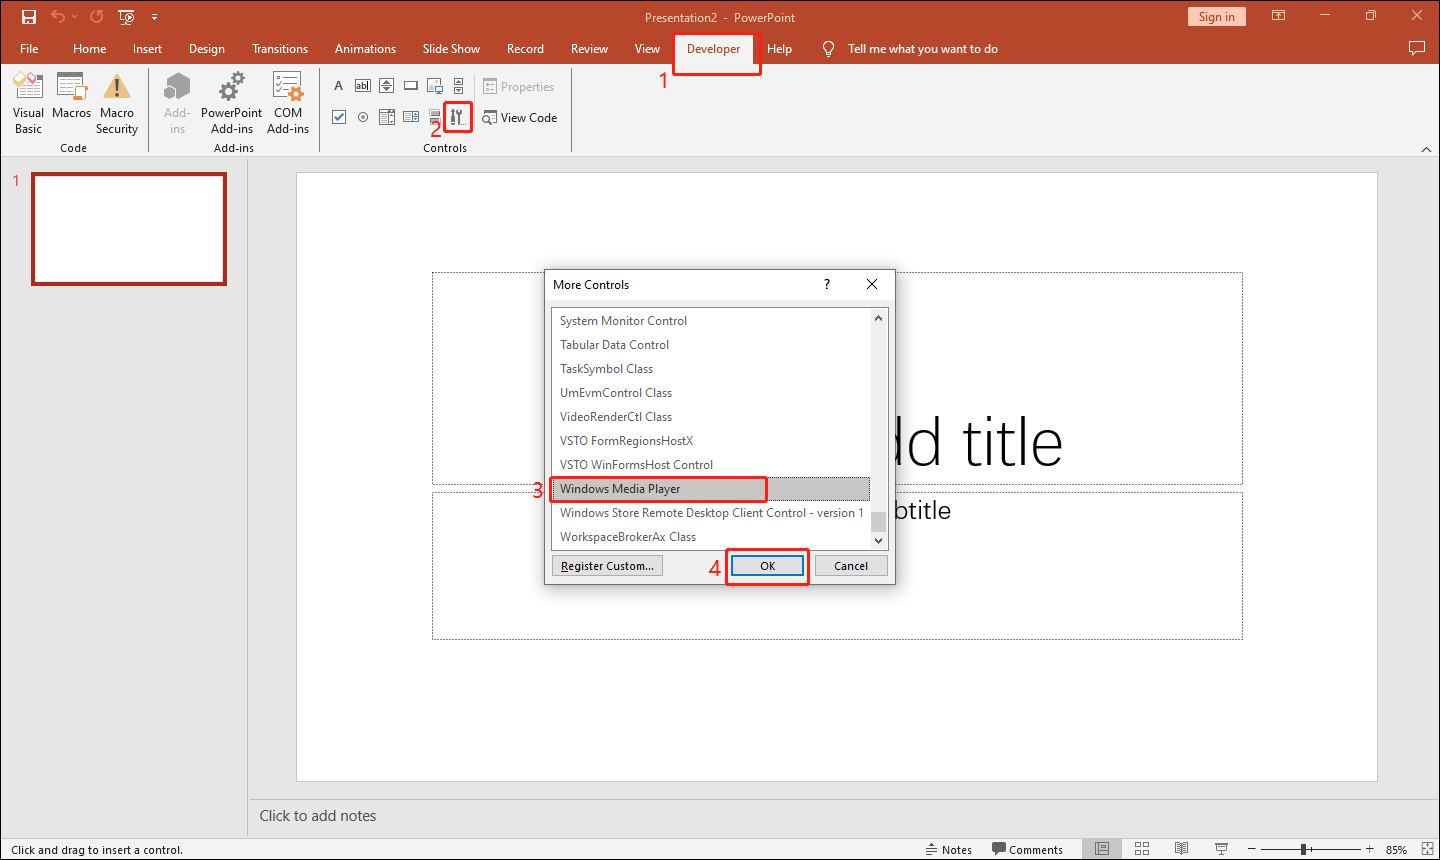
Step 2: Select the Developer tab in the top toolbar and click the More Controls icon. Scroll the pop-up list to the bottom, select Windows Media Player, and click OK.
Step 3: Click and drag on your slide to create a Windows Media Player box. After that, click Enable ActiveX to allow your video to play in the box.
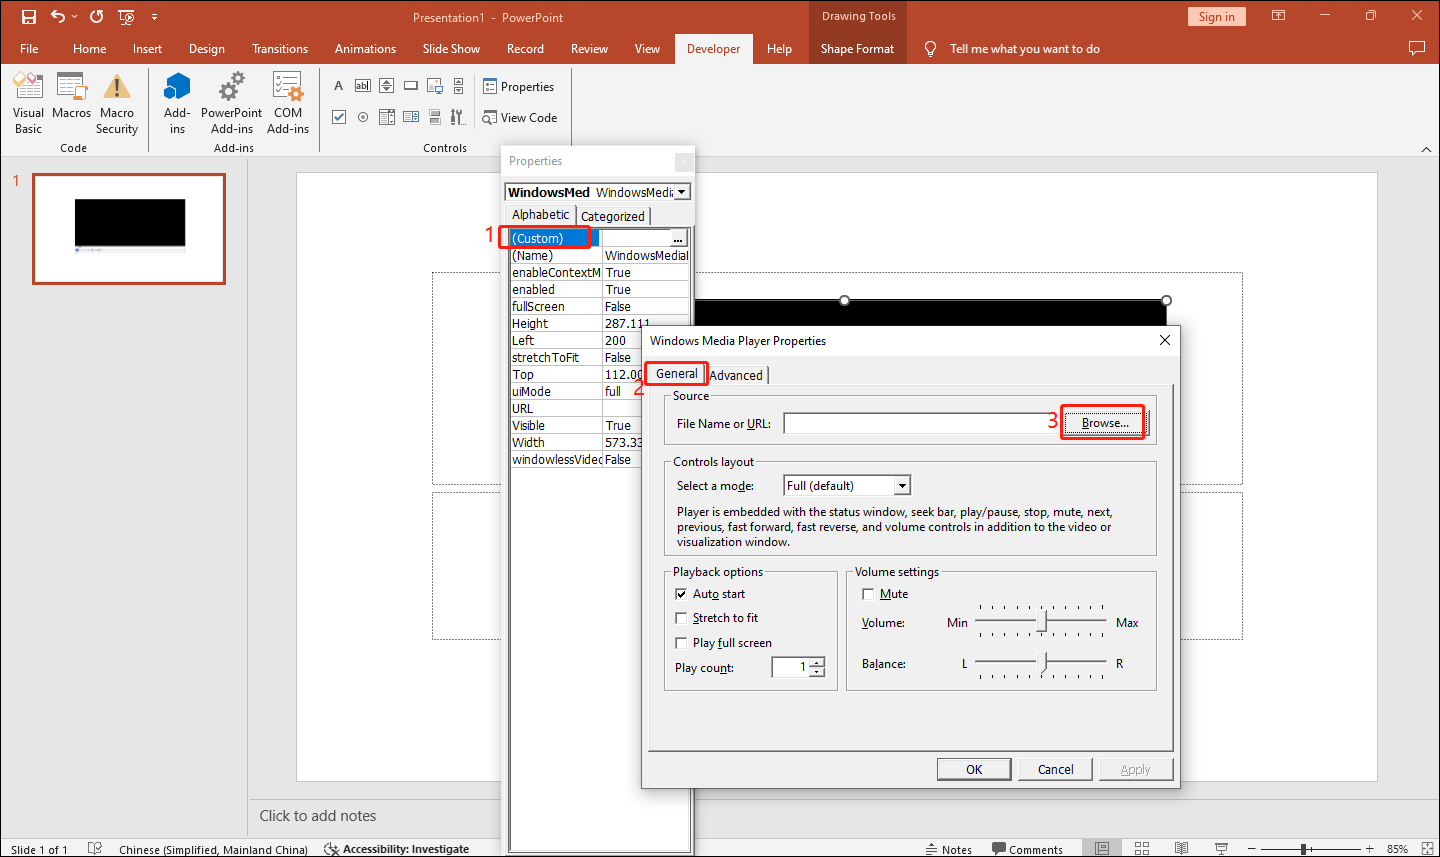
Step 4: Right-click on the Windows Media Player box and choose Property Sheet from the dropdown menu. In the Properties menu, double-click on Custom under the Alphabetic tab.
Step 5: You’ll see a new Windows Media Player Properties window. Go to the General tab and click Browse to import your video.
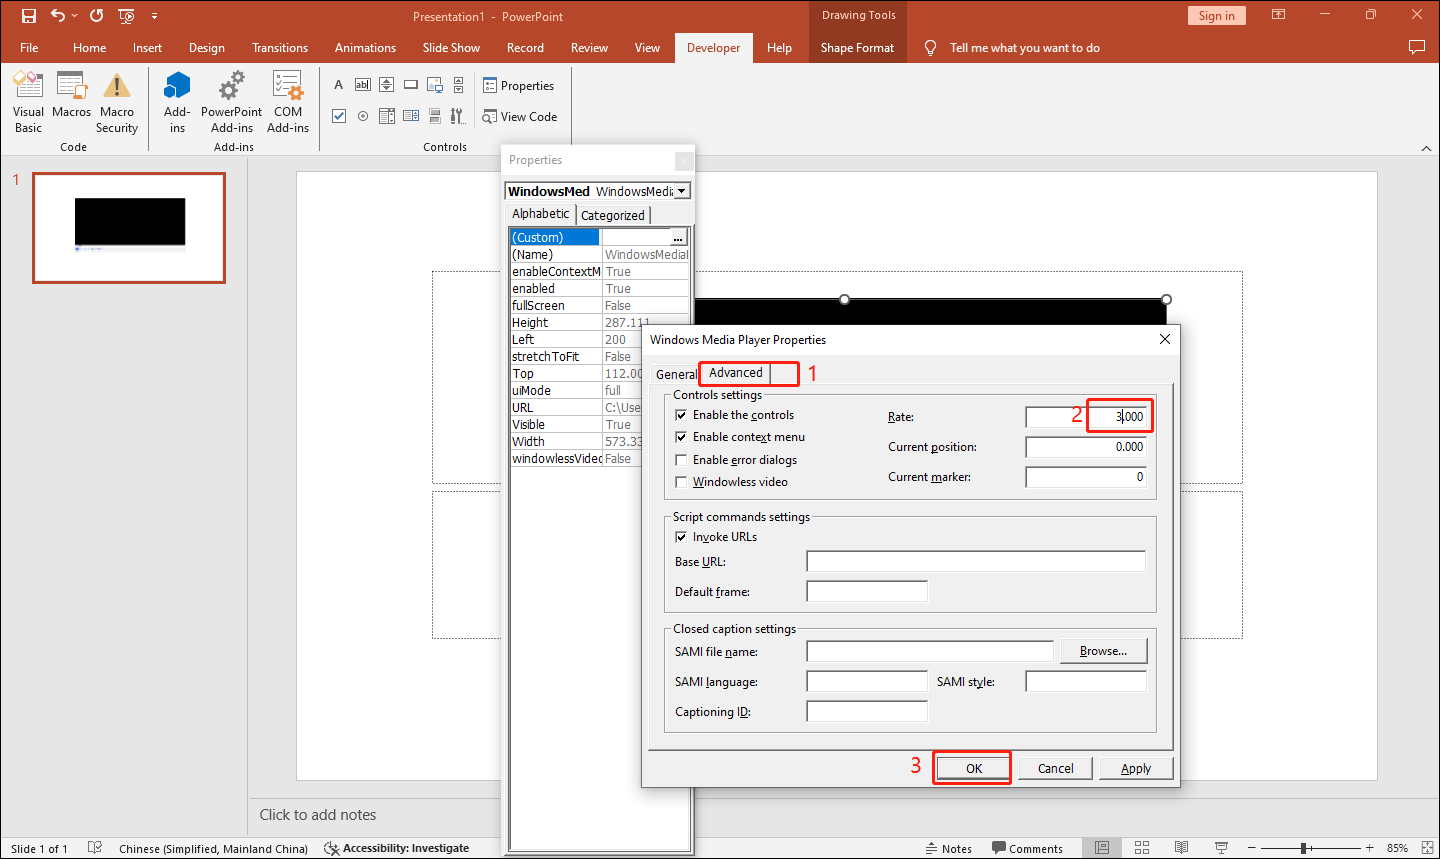
Step 6: Go to the Advanced tab, and increase the Rate value to speed up your video. After finishing all these operations, click OK to save these changes. Of course, if you want to decrease playback speed of video in PowerPoint, you can decrease the Rate value to slow down your video.
Step 7: Go to File > Save As to save your work.
Alternative: Change Video Speed Before Inserting It in PowerPoint
In addition to adjusting the video playback speed in PowerPoint directly, another more flexible approach is to make the speed adjustment before inserting the video into PowerPoint. This method avoids additional editing in PowerPoint.
Here I will show you how to speed up your video using MiniTool MovieMaker. It is a free video editing app and can help you realize the ideal video effect easily. In addition, you can add stickers, effects, filters, and more to your video, making it more engaging.
Step 1: Download and install MiniTool MovieMaker on your computer according to the instructions.
MiniTool MovieMakerClick to Download100%Clean & Safe
Step 2: Launch this software and close its promotion window. Click Import Media Files to import the video you need, and drag and drop it into the timeline.
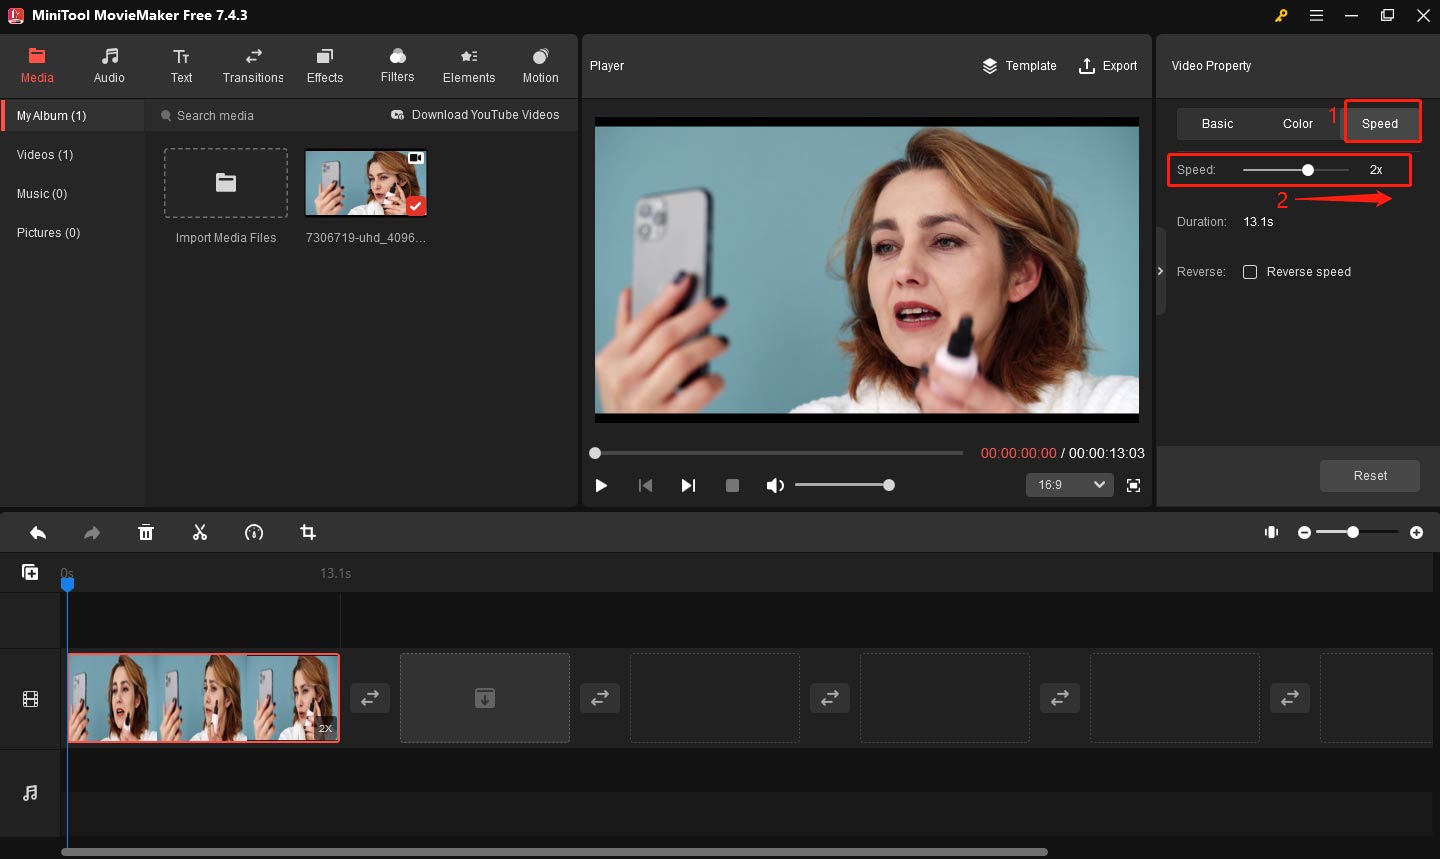
Step 3: Select your video clip, go to the Video Property window, and choose the Speed button. You can speed up your video by dragging the Speed slider to the right, and you can see the current duration of the video next to the Duration option.
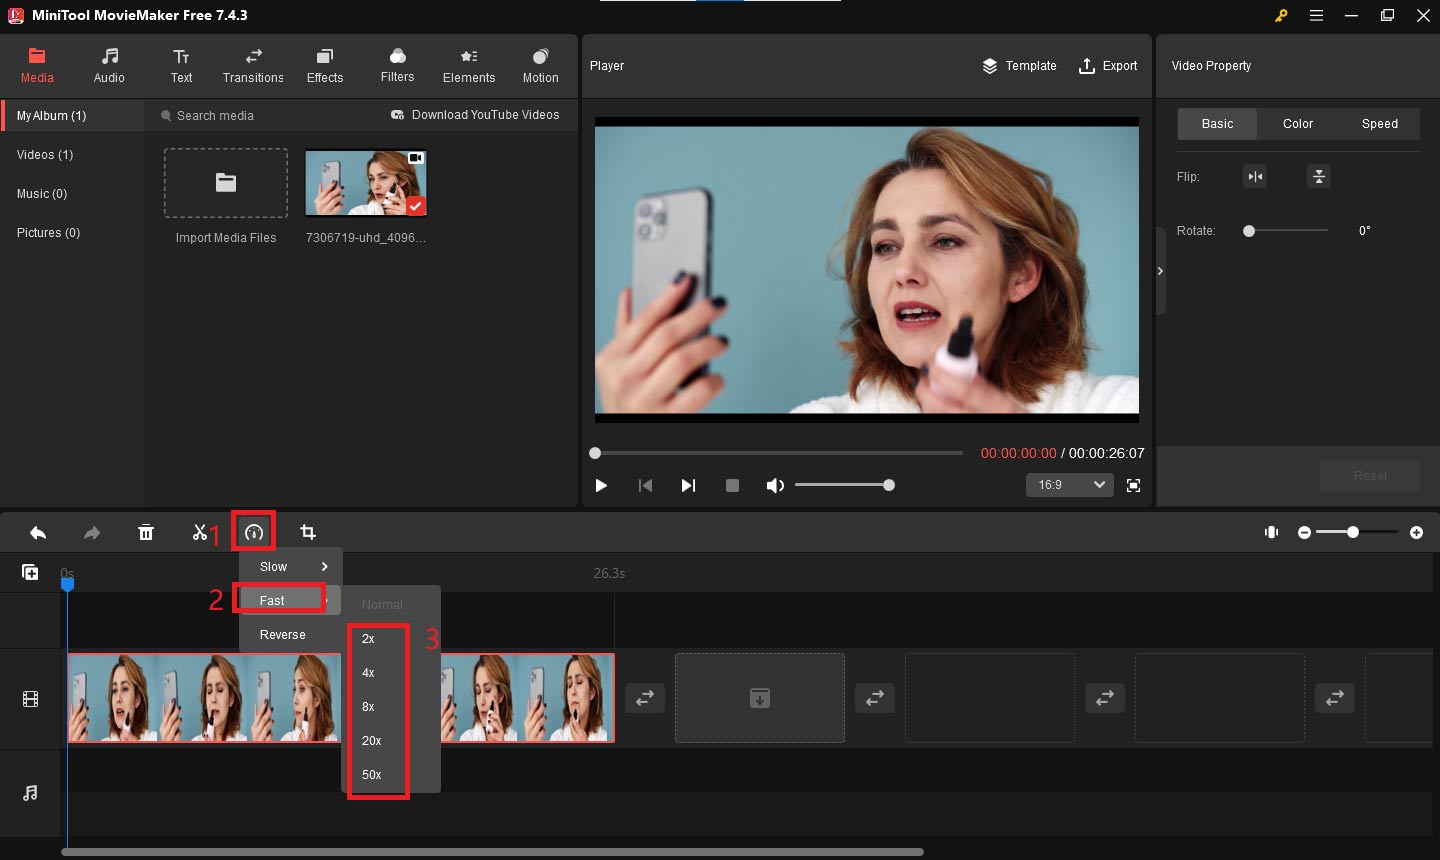
You can also click the Speed icon above the timeline and choose Fast. Then select the desired speed options including 2x, 4x, 8x, 20x, and 50x.
Step 4: After completing all editing, click the Export button at the top toolbar. Set your video name, location, resolution, and more in the Export window. Finally, click Export at the bottom of the Export window to save.
Bottom Line
This article explains how to speed up video in PowerPoint and change the video speed before inserting it. You can choose the best way to adjust your video speed.
The post How to Speed up Video in PowerPoint for a Faster Presentation appeared first on MiniTool MovieMaker.