Causes of Retouching Your Face in Videos
When we finish a shoot, we are often not too happy with our performance during the shoot, which may be due to poor skin, inappropriate angle, and poor lighting, so we always regret it, and there are 3 detailed causes for that.
Poor skin conditions
Skin condition plays a decisive role in a shoot. Dullness, dryness and wrinkles can affect the quality of the shoot. The bad skin condition affects the viewing experience of the video, while good skin condition can give an excellent visual experience to enjoy!
Inappropriate angle
A shooting angle is very important to magnify your beauty, and a good shooting angle can weaken some of your shortcomings and magnify your beauty. But not all photographers can find the appropriate photo angle for you.
Poor lighting
Inadequate or poor lighting is a major factor that leads to uneven skin texture in videos. Shadows cast by insufficient light can highlight imperfections, resulting in a less clear and smooth appearance of the skin.
In these cases, we always want to do it all over again, but reality often won’t allow us to do that. However, you can retouch your face in video to make it look more perfect.
MiniTool MovieMakerClick to Download100%Clean & Safe
What Retouch Features Does Capcut Have?
If you want to apply retouching features, then you first need to know what face retouching features are available, which is very important for you to utilize at a later stage. Here are some commonly used retouch functions in CapCut.
Slim face
In CapCut, you can use the slim-face function to retouch the face of a character. You just need to select the slim-face function and adjust the degree of face slimming according to your needs, then your face will be slimmed to your satisfaction!
Size eyes
This function can enlarge the eyes of the characters so that the eyes look more attractive. You just need to select the size-eyes function and then adjust the size of your eyes until you are satisfied, it can even adjust the distance between your eyes!
Brighten skin
This function can make the skin of the characters in the video brighter and more natural looking. You just need to select the brighten function and then adjust the level of brighten until you are satisfied, it can even whiten your teeth!
Smooth face skin
This function can remove the blemishes and wrinkles on the skin of the characters and make the skin look smoother. You just need to select the smooth function and adjust the degree of smoothness as needed until you are satisfied.
Filters
There are also some filters available in CapCut that allow the user to adjust the color and brightness of the video, etc. You just need to select the part of the video where the filter needs to be added and apply the appropriate filter function, and you can also adjust the intensity of this filter.
How to Retouch Your Face In CapCut
Now that you know the main retouching features in CapCut, you can do the actual operation to beautify your video. Here are the detailed steps to follow.
Step 1: Download and launch CapCut
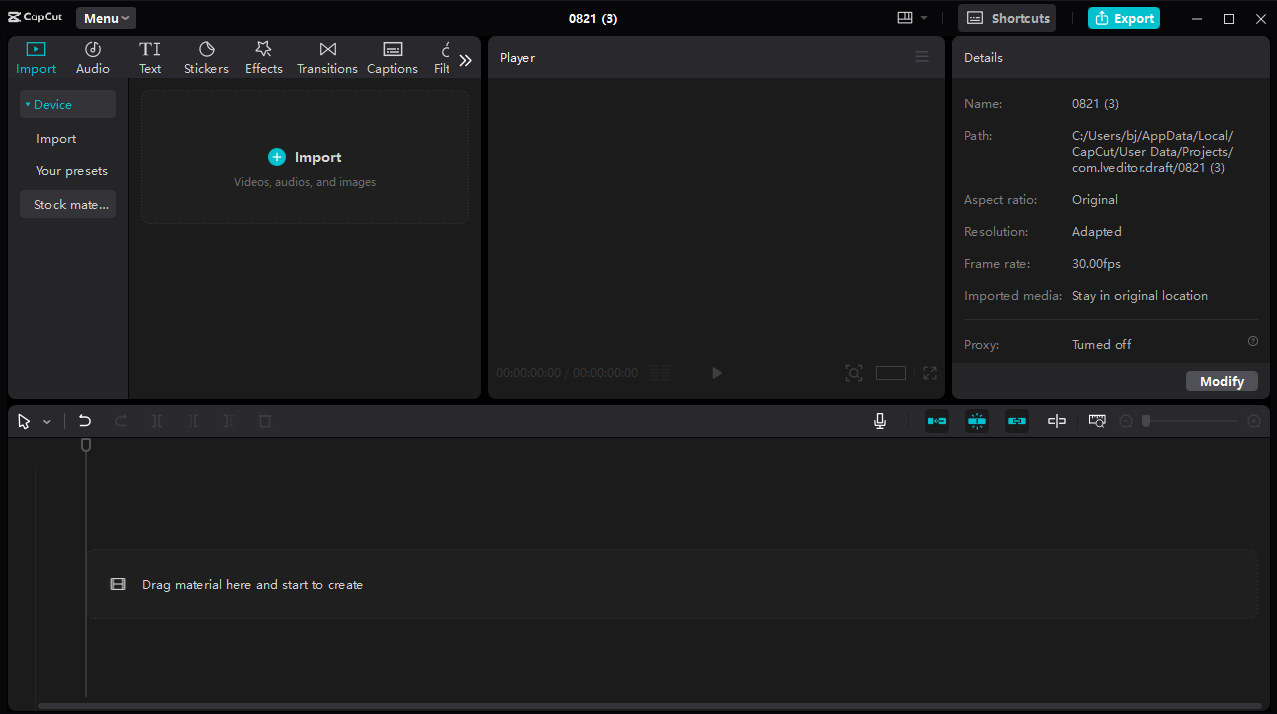
Go to the official CapCut website, download CapCut there, and follow the installation instructions to install it on your computer PC. Then launch CapCut, click Import to choose your needed video to import, and drag it to the timeline.
Step 2: Retouch your face
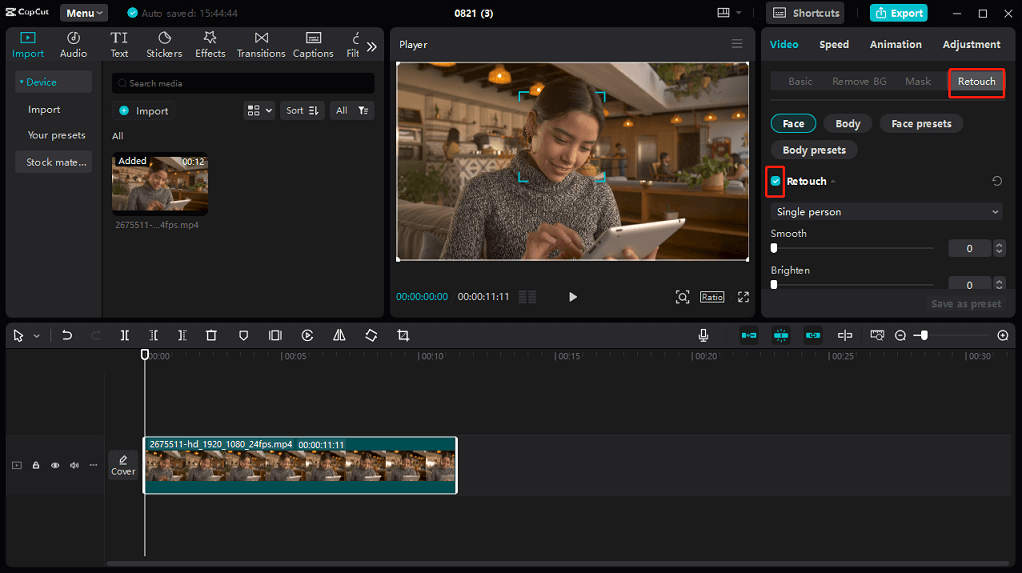
After importing the video, you can click Retouch first, and then click the little Retouch box symbol under Face in order to show the hidden function. There are Smooth, Brighten and White teeth in Retouch, and you can move the slider to adjust as needed.
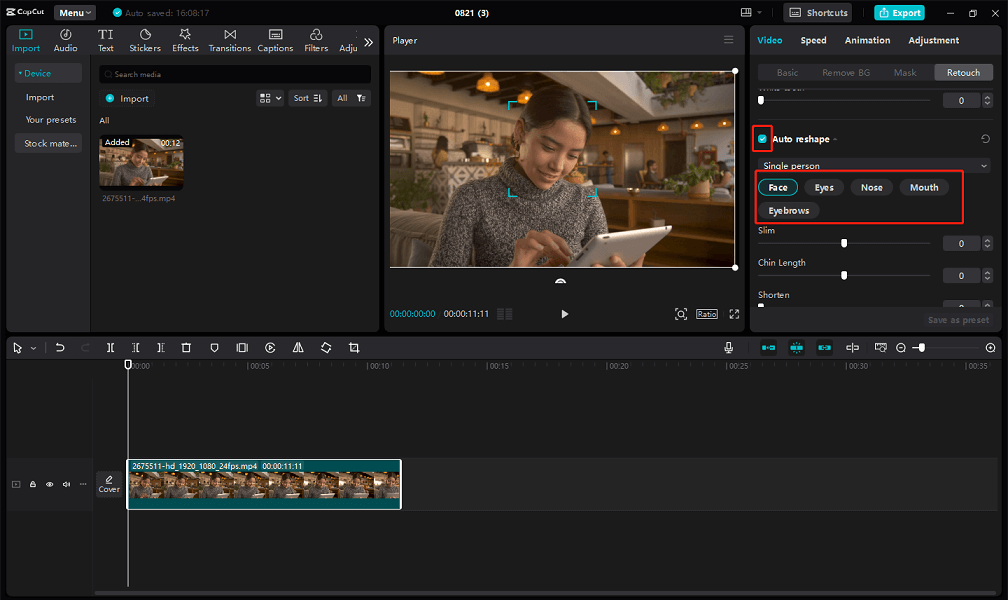
Click the Auto reshape box to show the hidden functions, and there are specific modifications for the Face, Eyes, Nose, Mouth and Eyebrows that you can adjust individually.
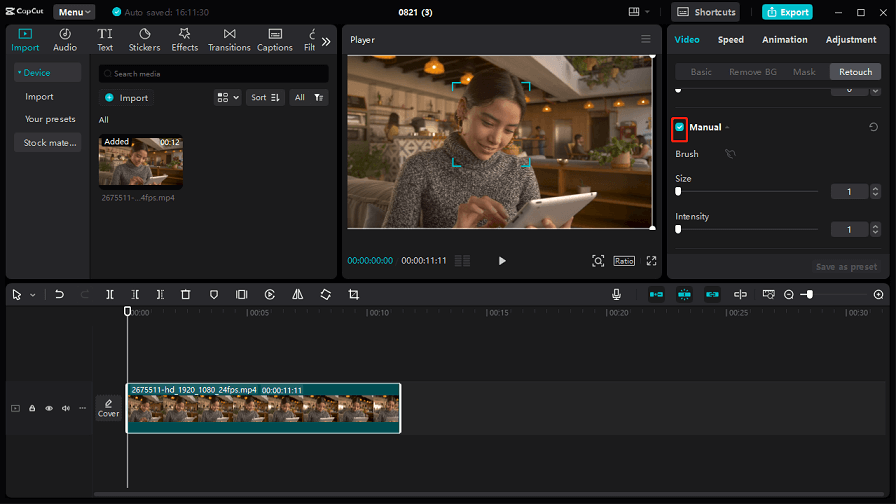
By clicking the small box next to Manual, you can manually adjust the shape of your face by dragging the sliders for Size and Intensity.
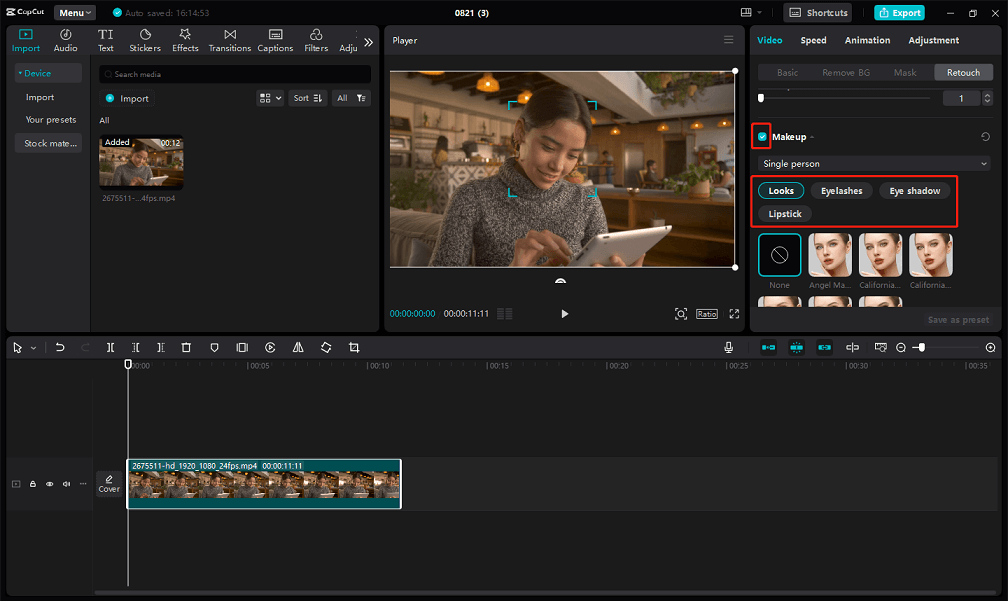
In addition, you can also add makeup to your face by clicking the little box next to Make up and then choosing the right makeup for your style.
Step 3: Export your video
After you have completed the appropriate retouching operations and get satisfied work, you can click Export to export the high-quality work.
Conclusion
The above is an introduction to a process of how to retouch your face in CapCut. I believe you have mastered the method of the retouch feature, I hope this article is helpful to you, and I look forward to you being able to create satisfactory work!
The post How to Retouch Your Face in CapCut to Look More Beautiful appeared first on MiniTool MovieMaker.